When it comes to choosing the best SEO plugin for WordPress, the Yoast SEO plugin takes the lead. Yoast SEO is one of the best All-in-One SEO plugins for WordPress. Using it you can improve your site’s SEO while it helps you to write better content.
However to get the full advantage of this plugin, you need to know it’s full potential and proper setup. In this article, we will walk you through the features as well as how to install and set it up to utilize all the essential features.
Features of the Yoast SEO Plugin
Yoast SEO is a powerhouse for improving the SEO on your WordPress site. The free version comes with many built-in tools and features while the premium version tacks on a few nice extras, listed below.
However before we start setting it up, let’s check out a few of the SEO functions offered by the free plugin:
- Google search results snippet preview
- Title and meta description support for taxonomies
- Add focus keywords
- Advanced permalink control
- Configurable breadcrumb titles for posts and pages
- Create XML sitemap
- Edit robots.txt and .htaccess file
- Meta robot configuration
- Verify site to Google webmaster tools, Bing webmaster tools, Yandex webmaster tools
- RSS footer configuration
The premium version offers all of those above as well as the following:
- Allow 5 focus keywords
- Easy redirect manager
- Supports Facebook open graph
- Internal linking suggestions
- Cornerstone content checks
Installing the Yoast SEO Plugin
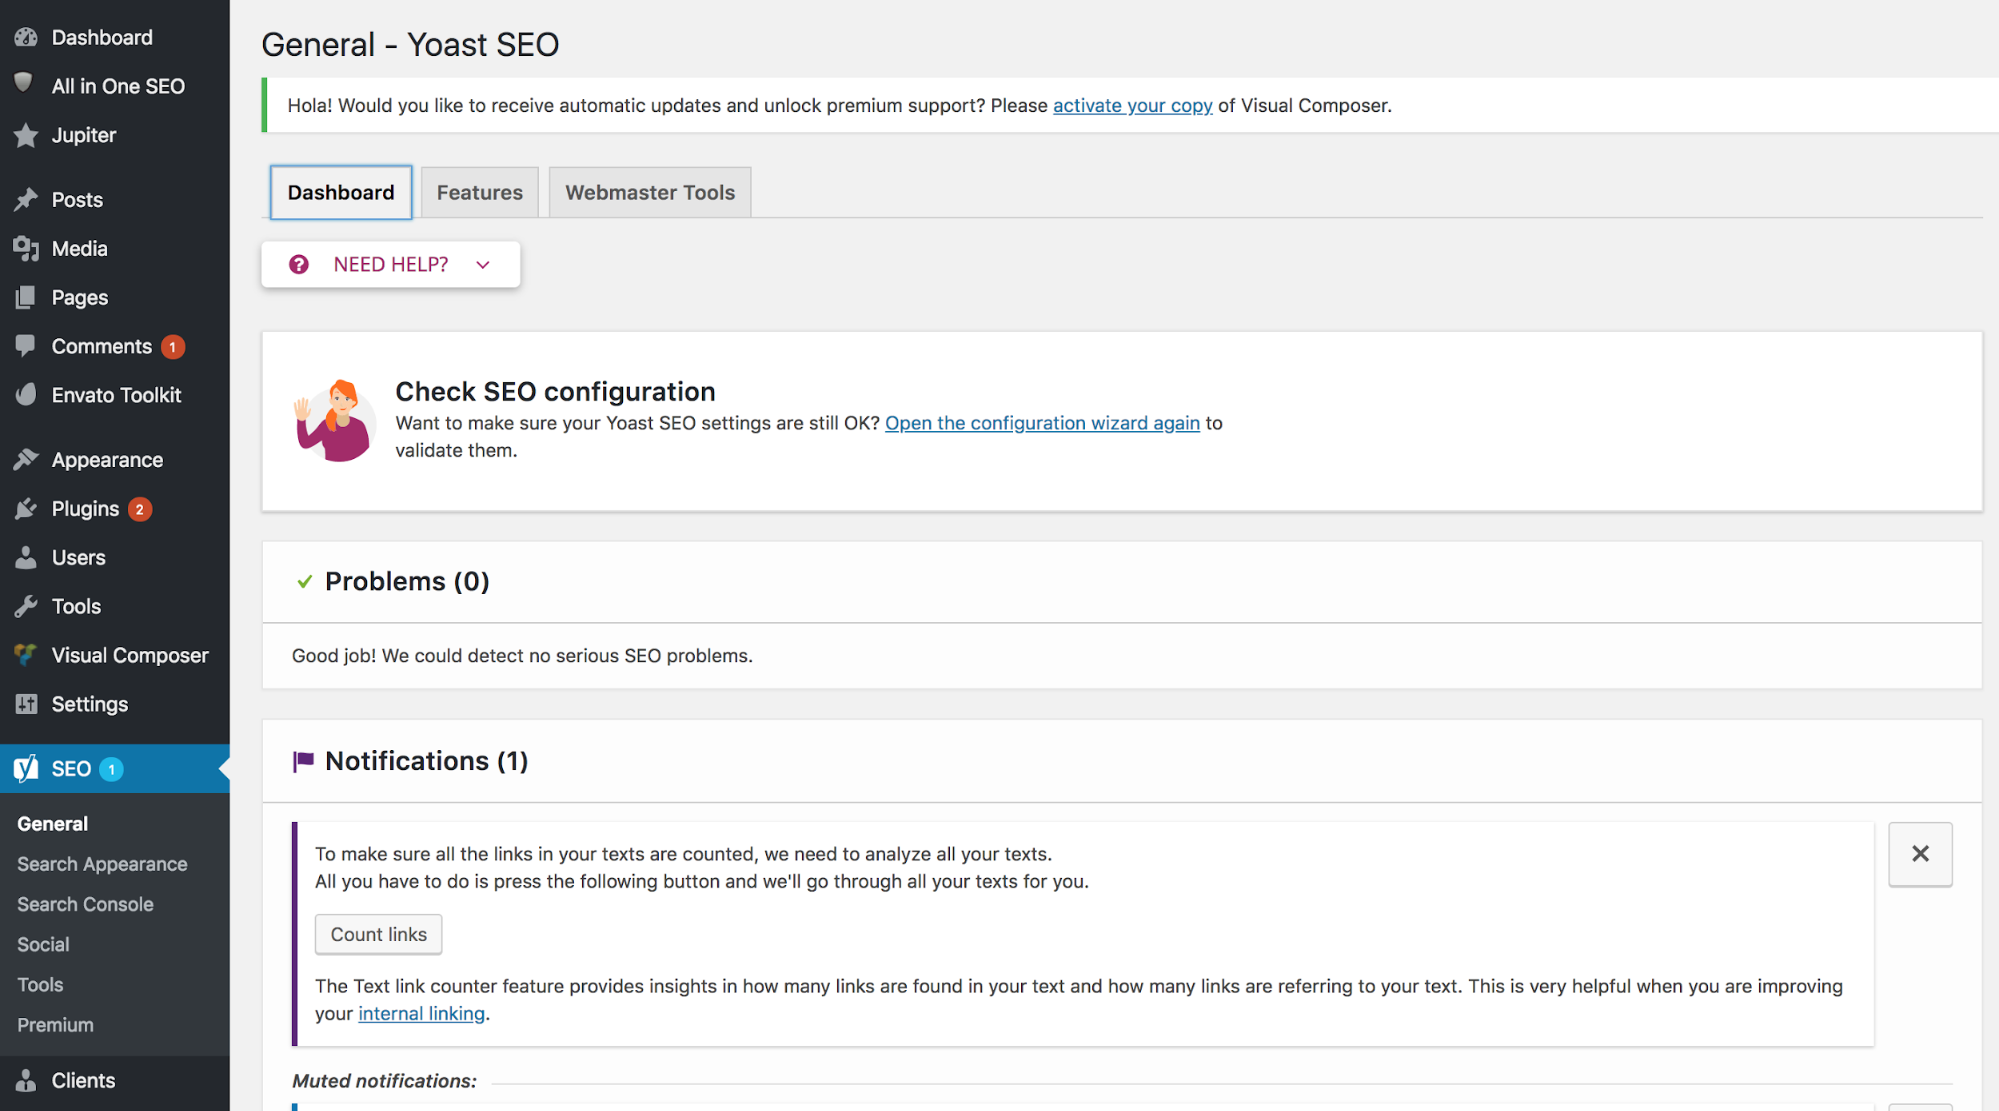
After downloading Yoast SEO from the WordPress Plugins Depository, you need to install and activate it. Upon activation, you will see a new menu item appear in the admin area of your WordPress site, with a name SEO and the Yoast SEO logo on it.
After the installation process, you can begin to use the plugin exactly as it is set up by default. However, we recommend spending a few minutes customizing it to maximize its performance.
1. Data Transfer
If you are adding this plugin to a site that has previously had an SEO plugin we recommend you import all the data from your old SEO plugin. If you have set up a new blog, then skip to #2.
Yoast has made this easy to do with presets for other popular SEO plugins.
Navigate to the sidebar SEO> Tools> Import from Other SEO Plugins. Select the plugin from which you would like to import your settings.

If you have used another SEO plugin not listed on their list you can use SEO Data Transporter plugin to move the data and settings.
2. General Settings
The first tab within the Yoast plugin is General. While Yoast offers a customization wizard we are going to customize everything ourselves.
Under the “General” tab you will have the option to delve into the “Dashboard”, “Features” and “Webmaster Tools’
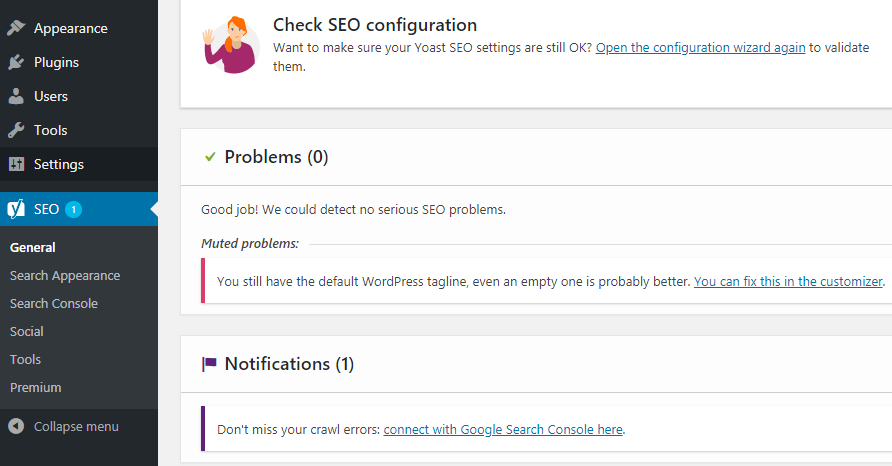
Dashboard
This screen features a brief recap of where you can come for help, any notifications that need your attention and any problems that it may have detected within your site.
Features
Under the features tab, you can control to turn on or off have Yoast make recommendations to improve your SEO, readability, cornerstone content, text link counter and others. We recommend that Yoast is turned on for SEO analysis, readability analysis, cornerstone content, text link counter, xml sitemaps, admin bar menu, and security: no advanced settings for authors.
There are many 3rd party services to regularly check if your site is indexed or not. While Yoast SEO offers RYTE integration with their plugin, to get the most out of it you need to pay for the service. We recommend turning off RYTE and instead using Google Search Console which checks your site’s indexing as well as many other stats.
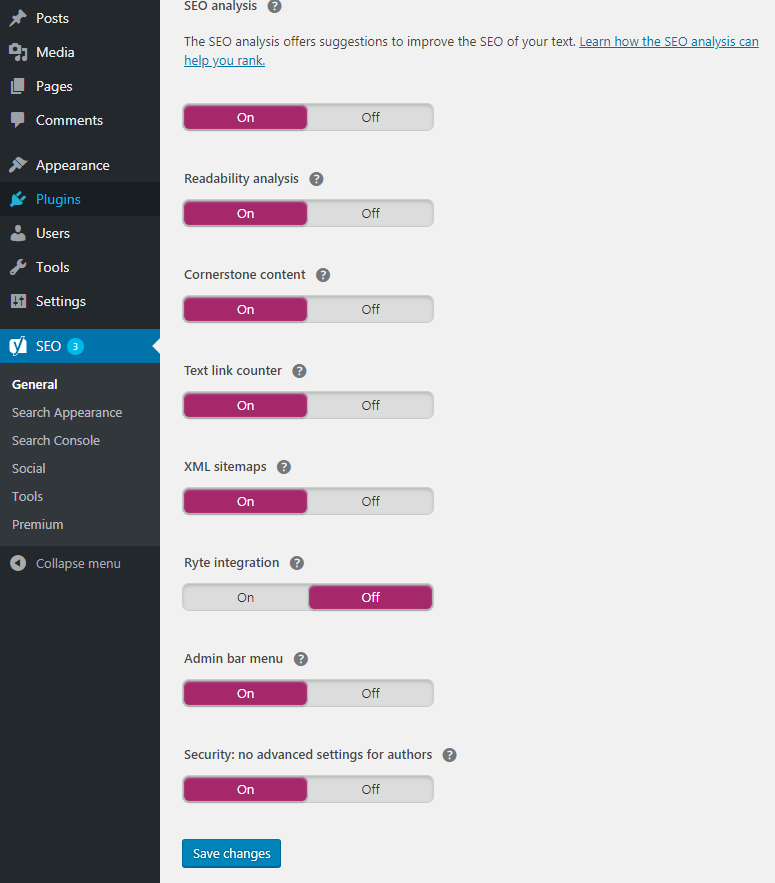
Once you set everything up, don’t forget to click Save Changes!
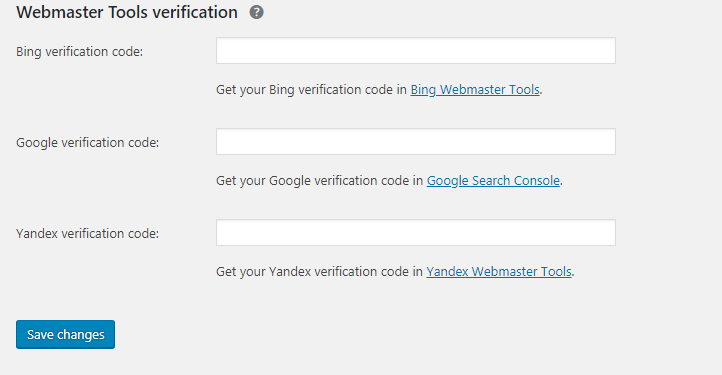
Webmaster Tools
In the final tab in general, you will see “Webmaster Tools”. This tab allows you to validate your website’s presence with Bing, Google and Vandex.
Note: In order to validate your site and see that unique information, you will need to add a Meta tag to your website or upload a file directly to your FTP. Yoast SEO simplifies this process for those who may not know how to add the Meta tags. You will need to get your meta tag from Search Consoles (Google, Bing, Yandex) and enter on the Webmaster Tools tab.
You can also go to different search console’s page directly by clicking on the highlighted link.
After clicking Save changes you are done.
Search Appearance
The second tab is Search Appearance. There are 6 tabs within this section and we will spend the time to focus on each one.
General
From here, you can create a unique title that will display your post title and site name. The symbols show variables that are replaced by specific values from the page when the page is displayed. They provide an easy to access help button for any general or specific questions you may have.
AmDee uses a standard dash (-) format, so our URLs look like https://amdeellc.com/blog/the-importance-between-nonprofit-branding-and-storytelling/
The Homepage section allows you to write your website name and include a Meta description if you have one. This information will be shown in the browser tab.
Yoast asks you to choose whether the website will be for a person or a company. If you select the company option you will be able to input your company’s name and upload the logo.
Content Types
From the second section, content types define the SEO for each specific area of your WordPress site. While the defaults are for Post, Pages & Media; if you are utilizing other plugins or features of your theme, you may notice more options there. Yoast automatically pulls new sections as you install and utilize additional areas, including if you have plugins to monitor employees or for banner sliders.
Note: By default, Yoast SEO hides the date from search engine snippets. Hiding the date encourages users to read more than just the most recent articles. However, if you are running a news site and wish to reveal the date for your posts in online search engines, you can enable “Date in Snippet Preview”.
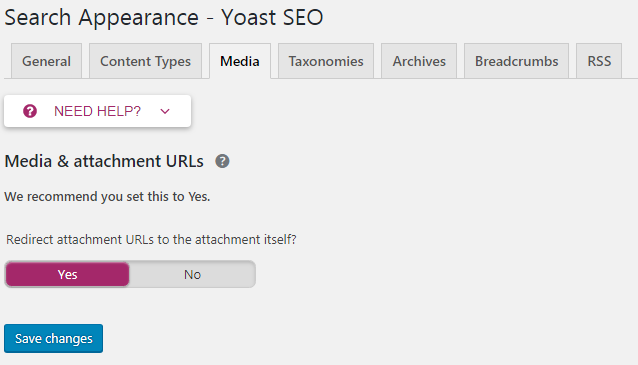
Yoast Media
The next option is Media and we recommend you allow it to redirect attachment URLs to the attachment itself by selecting “Yes”. When you upload media (an image or video for example) WordPress doesn’t just save the media, it creates an attachment URL for it. These attachment pages contain the media item and maybe a title if you entered one but are otherwise empty. It’s better to disable these basically empty pages, and redirect them to the media item itself.
4. Taxonomies
In WordPress, taxonomies are a grouping mechanism. From the Taxonomies tab, you can setup Title and Meta for categories, tags and post formats archives.
If you use the default settings Yoast SEO will pick up the descriptions from your categories and tags. It’s not common to use descriptions for categories and tags. We suggest you disable this by selecting “no”.
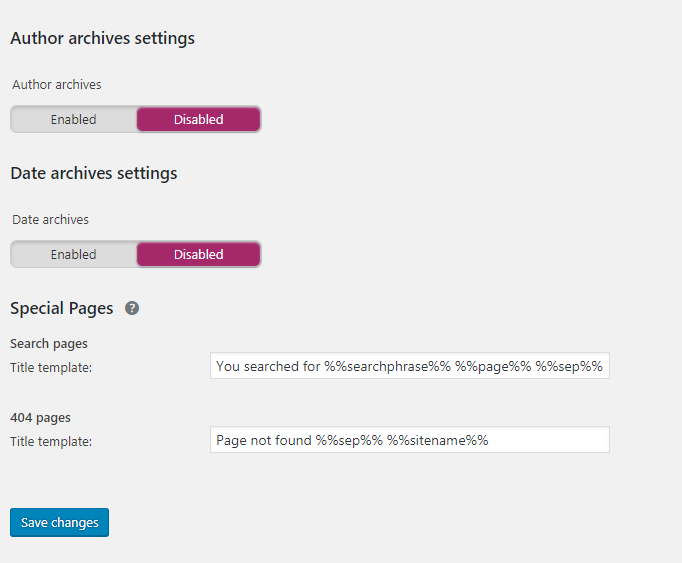
5. Archives
Your WordPress site supports automatic creation of archive pages. While it means you don’t have to think about manually archiving them as content changes, it can lead to content being duplicated. Under the archive tab, you can disable the Author Archive. This is especially important if you are a sole writer of your blog to reduce duplicate content.
6. Breadcrumbs
Breadcrumbs are used for internal linking. The term comes from the fairy-tale Hansel and Gretel, and like in the story, provide navigation support by showing the exact path or page you, as the user, are on. These breadcrumbs also appear in search results as they have pulled relevant content and keywords that are more easily searched. It is for this reason that they are a great advantage for users. We highly recommend enabling the breadcrumbs option.
7. RSS
RSS, often called Really Simple Syndication is a method to pull a variety of online content and display it in a standardized way. By using the RSS feature within Yoast SEO, you can easily add the original article into your RSS feeds. The added benefit is that you can also use it for advertisement purposes by easily adding copy to the beginning or end of each post stating where the article came from, such as “The post %%POSTLINK%% appeared first on %%BLOGLINK%%.”
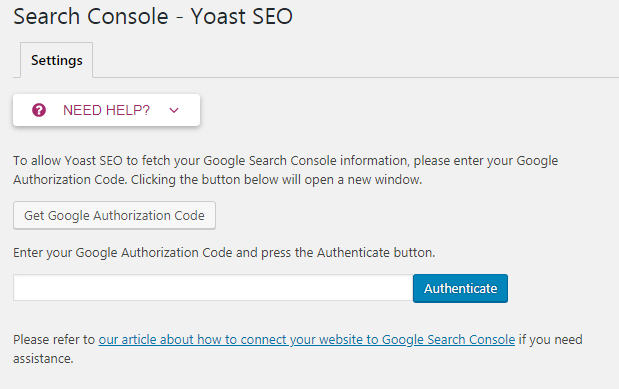
3. Search Console
If you have already submitted your Sitemap to Google Search Console, you can now integrate with Yoast. To fetch all the data or information you simply enter your Google authentication code.
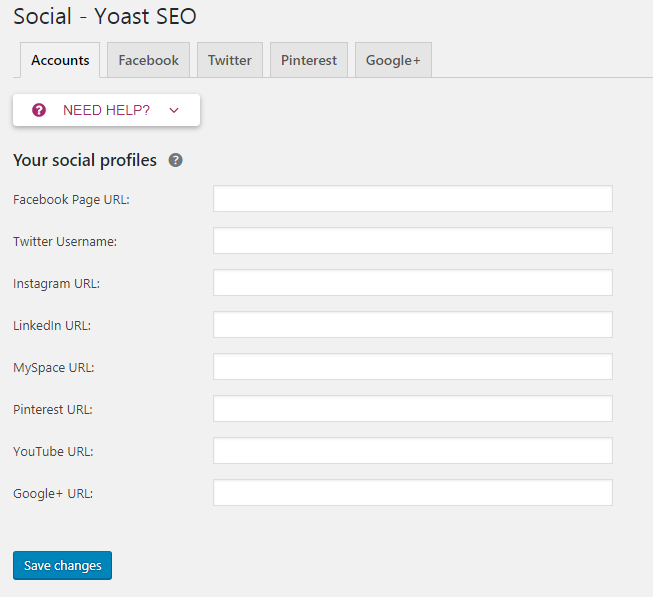
4. Social Accounts
In Yoast SEO, the developers have added a Google knowledge graph feature to easily integrate with your social accounts. This is done when someone searches your brand name by highlighting your social media profiles in the search results.
To configure those social accounts is very easy. Enter your social account URLs, click save and you are done.
Note: We also recommend you to add a title, short descriptions and default images for your social accounts.
5. XML Sitemap
While finding the XML Sitemap of your WordPress site was easy in the older version of Yoast SEO plugin, changes have been made in the current version at the time of this article being written. While it’s now harder to find Sitemap for beginners we’ll help walk you through how to get to it.
To find your XML Sitemap, go to General> Features and click on the question mark next to the Sitemap option.
Then click on See the XML Sitemap to see your WordPress site’s sitemap. Once you have it you can now submit it to Google Search Console to improve the indexing of your posts.
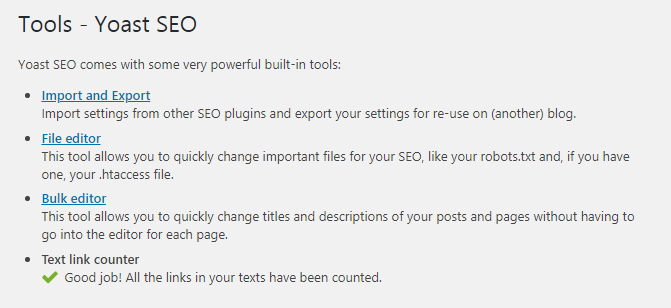
6. Tools
While this is the last tool it is still very useful, especially as you progress past beginners level. Using this feature, you can easily edit your .htaccess, robos.txt files. You can also quickly change titles and descriptions of your posts and pages using the bulk editor function.
That’s it. While we’ve tried to be clear in how to properly setup the Yoast SEO plugin we do need to warn you that any misconfiguration of this plugin can harm your SEO. It’s imperative to be careful, follow the steps as outlined and proceed with caution knowing that as updates are released for the plugin some of the steps may change too.
We hope this tutorial has helped you to set up your Yoast SEO plugin for WordPress. If you are having a problem, reach out via our contact link or via twitter at @amdeellc.

Amar T.
Amar is the president and co-founder of AmDee. He has been an industry leader in accessibility compliance—auditing and remediating websites, publishing articles, delivering presentations to national audiences, and training content editors and developers in accessibility best practices.
You May Also Like
Having a website is an absolute necessity for any business. Gone are the days when you could simply update your website once and forget about it for months on end. In today’s ever-changing digital landscape it is important to constantly track and measure how well your website performs, as well…
read more >
Thomas Bertram (T. Bert) Lance famously said, "If it ain't broke, don't fix it." Unfortunately, T. Bert Lance couldn’t foresee the future. He didn’t know that over 94% of Americans would be on the internet by 2024. If your website doesn't receive periodic updates or isn't accessible, users can become…
read more >